DIY Beauty
Over the last couple weeks I have been scrolling deep into Pinterest for recipes. Not for food, I google those, but for beauty and cleaning products. I have been compiling a board, you can check it out here! I've been toying with the idea of making my own products since I couldn't find a conditioner bar which suited me. And I've finally had an afternoon free where I can make a mess and have some fun!
 |
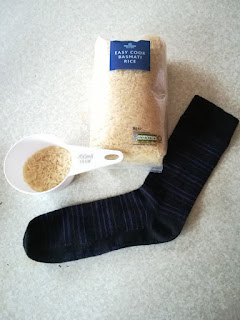
| All the ingredients. |
I decided to start with three, mostly because I was limited by ingredients. But I figured that was a good thing because if I am terrible at this or they don't work then I haven't spent much on it. But if they do work, then I can venture onto bigger things! The three I have gone for are:


 |
Ingredients aside, I went for these three because I have a greater need for these. My job is hard on my hands - so much cracked skin! - so I need to pamper them more often. The need for conditioner is what triggered this all. In case you hadn't noticed I have, in fact, lopped off my long locks. They were ratty, impossible to brush, and well my hair dresser said, "Hello mess!" when she set her scissors on it. So... It had to go, needed a factory reset. And something to actually condition it with. I have been using straight coconut oil before shampooing, but having a deep condition once a week sounds like a do-able luxury. And I opted for the face scrub because I love giving my face a good scrub - getting in all those pores. I have found a face wash soap bar, which leaves my face lovely and soft, but again, that weekly deep clean!
With all my ingredients and recipes gathered, it was time to make! My partner and I went to IKEA this week, so I grabbed their RAJTAN glass jars as I figured they'd make suitable recepticles. I also grabbed a brilliant bamboo recipe/tablet stand which held my notes up nicely. Only thing left was turning up the tunes. Spotify had a playlist called "Cheesy Hits!" front and centre, so naturally it had to be that. Great choice, it's full of bops. The playlist is embedded below if you fancy jamming to the same playlist while you do your own DIYs.
 |
| Sharpies at the ready! |
I made the conditioner first. This one was nice and easy to blend, although my coconut oil was a little rock solid. Leaving it submerged in the leftover washing up water did the trick. (It's a good job I left the sink partially full, I got through so many spoons!) It didn't make massive amounts, but my logic was if it's good I can make more. For the essential oil, I chose Emily Dove's Lemon Sherbert. It occurs to me now that I should have consulted the pin which said the benefits of the oils, but I bought it on my break and I was distracted by my name. Apparently I am a sucker for anything named Emily. Lemongrass is good for oil control and my hair does get greasy, so fingers crossed!
 |
| For all it looks like cake batter, the smell would give it away. |
The Verdict? I was worried that I would need to use all of this in one sitting. I did not need to have that worry, one scoop was ample. I guess I forgot I don't have ten tonnes of hair. This smelled amazing as I used an ice lolly stick to scoop some onto my hand. I last minute needed something to reach the stuff in the jar, which resulted in me force feeding my partner ice lollies. I don't think he minded.
The mix was a little lumpy, but that was the coconut oil not being melted enough. So that's a next time lesson. But it didn't affect the result much. My hair feels soft and conditioned, no traces of oil making it greasy. I will definitely revisit this recipe and experiment with different essential oils.
 |
| Messy action shot! |
After the conditioner I made the facial sugar scrub. Scooping out a cup of sugar was a little alarming. I work in ounces, so it seemed like a lot! But it blended nicely with the other ingredients and doesn't seem too dry or runny. The recipe called for "pure vanilla extract" which I decided to chance. I knew I had something vanilla-y in my baking box. Turns out it was flavouring and all sugar, which I didn't think was a necessary addition to the mix. Having a quick look through the box, I found mint extract which I figured would do instead. Lots of face washes have mint in them. Or am I just mistaking that minty feeling of tea tree? Maybe next time I'll use tea tree oil...
The ingredients went together easily, even the mint smelled like it was adding something. It quickly became recognisably a sugar scrub. There was also a lot more of it than the first recipe and I feel like it will last me a good while.

The Verdict? I had a little trouble with this one. Initially, I scooped out too much and had to try and smush it back into the jar while trying to not get any water in it. But that was me being dumb, so I wasn't going to hold that against it. When I put it on my face, the coarseness of the sugar was intense! I felt like I was getting a very good scrub from this - if a little painful. Maybe next time use a smaller granule. When it came to washing it off, it did leave a fine layer of melted sugar on my face. Now this is something I have encountered with shop bought sugar scrubs, so I'm guessing it's normal? But it could also have been down to the fact I had used too much or the shower wasn't hot enough. I gave it until the end of the shower to see if the layer thinned any. It had, but I still gave it a quick wash off with my face bar. I didn't want to be sticky after a shower!
My skin was soft and tingly afterwards, so it did its job. But some experimentation is definitely needed. I need to see how it is using less. I am also going to wet it before putting on my face, see if that helps with reducing how coarse it is. I am hopeful.
 |
| I may have got briefly distracted by dancing to this epic bop. |
The last one I made was the hand scrub, which was the only pin which gave me actual instructions to follow. Basically it was combine the wet and dry ingredients separately before stirring them all together. I'm glad the instructions were there because I think if I'd have gone for the same approach as the last two it would not have combined as nicely. The sugar and salt were combined with the lemon juice, giving it a crumbly texture; while the honey and coconut oil took some elbow grease. That was partly their viscosity and partly that the coconut oil had solidified again. It was a lot of putting it down, doing something else, and picking it back up. But maybe I am just a wimp. Combining the two bowls was surprisingly easy though, after the trouble I had with the wet mix.

The Verdict? I used this pretty much as soon as I was done cleaning and washing up. It poured readily out of the pot, to the point where I think I used too much. It gave a good scrub. You can feel the difference between the coarse salt and soft sugar. I gave the dry section on my hands a good massage and it is definitely feeling softer. I did make the mistake of using the kitchen sink, which I'm sure you noticed was burried under clean pots and pans. I had to get my partner to turn the tap on for me. I can't see that being a problem in the bathroom though, which is where it will live. My hands feel soft and smell tasty. I was worried that the honey might leave a sticky residue, but it very much hasn't. I will happily remake this one, although I feel I should make others to compare and contrast.
 |
| Maybe blue wasn't the right colour... |
What have I learned for next time?
- Melt. The. Coconut. Oil.
- Have a better variety of essential oils which confer some actual benefit to the product I am making.
- Get more pots! Upcycle, RAJTAN jars, whatever. All I know is I am going to try this again.
Anyone have any DIY beauty tips to share? Do let me know while I bop to Cheesy Hits!


Comments
Post a Comment